Friday, August 14, 2015

Shine

Can you believe that it is the middle of August already!?  Since it is, that means it is time for our mid-month inspiration post on the Crafty Hazelnut's Christmas Challenge Extra blog.  If you haven't been playing along, there is still plenty of time.  Anything Goes as long as it is Christmas related.  Here is my inspiration for you:
 I just love shaker cards, don't you?  They're so fun!  This next pic shows the shaker in action.

Challenges:
Crafty Gals #32--any holiday
Addicted to Stamps #157--make your mark (ink)
MFT #241--sketch

Word Art Wednesday #196--anything goes with uplifting sentiment
Tuesday Throwdown #257--favorite occasions (definitely Christmas for me!)
Crafting with an Attitude--anything goes
Sparkles Christmas Challenge #55--no patterned paper
Christmas Cards All Year 'Round--snowflakes
Southern Girls Challenge--shiny, blingy, happy things
Mod Squad--heat emboss

Supplies:
Stamps: PTI "Sparkle and Shine Holiday"; Hero Arts musical background
Dies: PTI "Fancy Flakes" large snowflakes and "Sequins"; Sweet n' Sassy snowflake dies (3 smaller snowflakes); MFT "Blueprints 13" stitched rectangle; Spellbinders "Standard Circles, large"
PTI "Aqua Mist" card stock and "Aqua Mist" and "Ocean Tides" ink

Wednesday, August 12, 2015

Summer

It's Wednesday again and that means it's time for another What If? Wednesday challenge from The House That Stamps Built.  This week it is Sun, Sand, and Surf.  Fun, right?
Here is my summery card:
 I started our with Repeat Impressions' "9016W. Sandcastle", then stamped "4109W Sand Dollar" on the background piece to give it some subtle pattern.  Check out those letters!!  I'm just in love with how they turned out.  Here's a close up:
I colored a strip of scrap white card stock with a brown Spectrum Noir marker, then swiped some aqua mist ink directly from the ink pad below the brown.  I sponged on a bit of medium blue to tone down the aqua and add "waves" with a darker blue marker and a white gel pen.  Then I taped my letter dies in place and die cut them from the strip.  I also die cut the letters from white card stock 3 times and layered all four sets together to create some depth.  Did I mention that I love how it turned out?  It's so fun.  
Head on over to the House blog and see how the rest of the DT interpreted this challenge.  Their cards are pretty fabulous!

Challenges:
Cards Galore--anything goes
Pattie's Creations #113--anything goes
Crafty Calendar Challenge--bingo (I went with the center row: die cuts, kraft, blue)
Craftin' Desert Divas--keeping cool
Paper Girls #85--Large letters
I used the sketch from Hanna & Friends and then realized I didn't have a "living creature" on the card which is part of the rules, bummer!
Frosted Designs--metal/metallics (metal star brads)
Brown Sugar #158--anything goes
Fussy & Fancy #145--Lazy Summer Days
Jo's Scrap Shack #100--anything goes
Creative Fingers #89--anything goes
Wags n' Whiskers #160--Frame it out
Sweet Stampin'--anything BUT a birthday card
Eureka Stamps #153--Hot, hot, hot!
Sweet Stamps #234--Anything goes
Crafty Cardmakers #145--warm summer colors
Fashionable Stamping #102--seaside or beach

Supplies:
Stamps: Repeat Impressions "9016W Sandcastle" and "4109W Sand Dollar"
Dies: Spellbinders "Classic Circles, large"; PTI lowercase letters; MFT sunshine
PTI: Aqua Mist card stock, ink and grossgrain ribbon

Monday, August 10, 2015

Project of the Week

At the beginning of July, I joined the Repeat Impressions Rock Star Team and I've been having a blast.  Each Monday, the Rock Stars take turns sharing a project of the week on the Repeat Impressions blog: The House That Stamps Built.  This week, it just happens to be my turn.  I'm a bit nervous as it is my very first one, so please be understanding, okay? I'm going to show you how to use frantage (the chunky embossing powder that you see all over in the card making world right now) with a mini tutorial on using a stamp-a-ma-jig.  I just learned how to use frantage the right way and I'm super excited.  Here is what the finished card looks like:
Ready?  Let's go.  Here are the items you will need to create this card:
1 Piece of white card stock 4.25 x 11 inches scored at 5.5 inches on the long side
1 Piece of kraft card stock 4.25 x 5.5 inches (my kraft is too flimsy for a card base, so I will attach it to the white card stock base)
1 Piece of white card stock 4 x 5.25 inches
Aqua Mist ink (Papertrey Ink) and an ink dauber
Versamark ink
Black ink (which I forgot to add in the picture above)
Stamp-a-ma-jig
Stampendous Frantage Embossing Powder (I used Shabby White)
Regular gold embossing powder
Heat Tool
Score tape
Repeat Impressions stamps "4109 Sand Dollar" and "2407 Life's a Beach"

I started out by using my ink dauber to ink the edges of my 4 x 5.25 inch piece of white card stock with aqua mist ink.  If you look really closely, you can see that I used a pencil to lightly trace my sand dollar stamp onto the panel so I would have an idea where I wanted to stamp the image.
Then I used my Stamp-a-ma-jig to get the proper alignment.  I forgot to take a picture of the very first step (arghh), but I do have the first step later on with the sentiment.  Line up the acetate piece in the corner of the tool, ink up your stamp and line up your mounted stamp right in that same corner and stamp.  You can see how my black image is in the upper left corner.  I used black so I would be able to see it against the white card stock. 

Place the image on the acetate in the spot you want the image to be on your card.  Then nestle the tool right onto the corner of the acetate.
 Remove the acetate while keeping the tool in the same position and line your stamp (black ink cleaned off and the stamp re-inked with versamark) up in the corner of the tool and stamp.
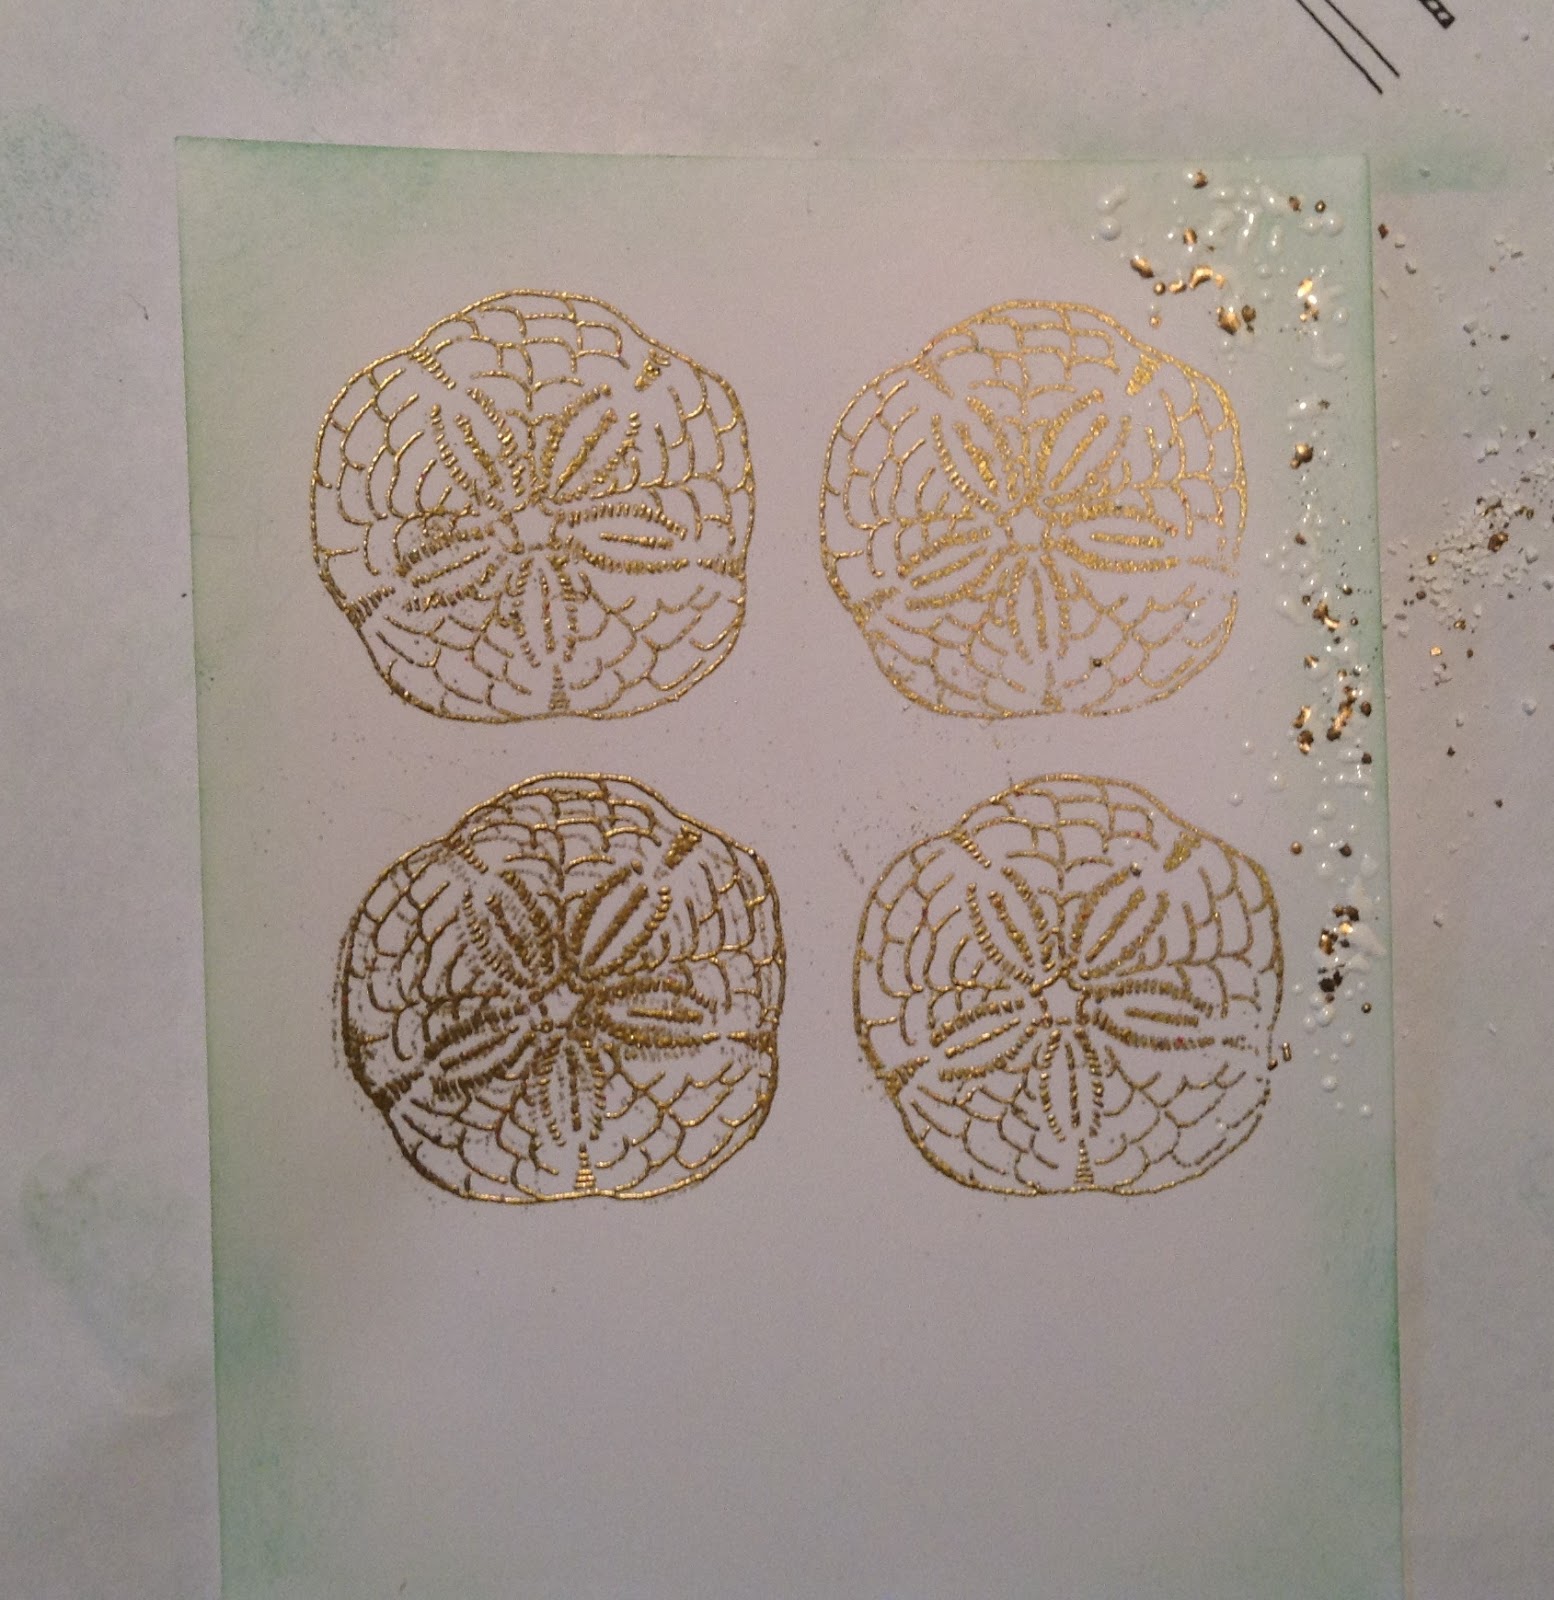
 After I had stamped all four of the sand dollars I covered them with gold embossing powder.
 And embossed them with my heat tool.  All nice and shiny.
 Now the fun part!  Working on a small section at a time, sprinkle on the frantage powder.  I use a small paintbrush to sweep stray pieces.  Turn on your heat tool and (this is the KEY!!) heat the powder from UNDER the card stock.  If you try to do it from the top like normal embossing powder, it will blow all over the place and not a single piece will stay on the card stock.  I know, I've done it.  But if you do it from underneath, the powder barely moves.
 Here it is nice and melted: 
 Continue on in this way until you have gone all the way around.  This picture shows my panel all embossed except the last section.
 Once that is finished, it's time to stamp the sentiment.  Here is the promised picture of the first step for using the Stamp-a-ma-jig.  The acetate is lined up in the corner of the tool and the mounted stamp has also be lined up and stamped.
 Place the sentiment on the acetate in the position you want it on the panel and line up the tool.
 Remove the acetate while keeping the tool in place and nestle the stamp in and stamp.
 My card stock warped a bit due to the embossing, so I used a lot of score tape to adhere it to the kraft panel.

 It needed a little something else, so I add a tiny pearl on either end of the sentiment to draw attention to it.
 Here's a close-up of all the frantage goodness:
Thanks so much for stopping by and checking out my Project of the Week.  I hope it was helpful.

Challenges:
Sister Act Card Challenge #112--anything goes
V's Sweet Ideas #37--anything goes
{Pin}spirational Challenge #146--inspiration photo (I was inspired by the beach theme)
https://www.pinterest.com/pin/141581982005984747/
MFT #240--sketch

Addicted To Stamps #156--anything goes
Inspiration Destination #45--anything goes
Raisin Boat #36--summertime
Frosted Designs--metal/metallics (I used gold embossing powder)
Brown Sugar Challenge #158--anything goes
Sister Act Card Challenge #118--anything goes
Jo's Scrap Shack #100--anything goes
Creative Fingers Challenge #89--anything goes


Wednesday, August 5, 2015

Color Challenge

Welcome!  Today begins another challenge at The House That Stamps Built blog.  It's a color challenge: Lemon, Lime, Aqua.  Color challenges are definitely a challenge for me.  I can mix two colors no problem, but add more than that and I just get a brain freeze.  : )  So, I've figured out that the best way to create with color is to go nice and CAS.  Here is my card:
My sentiment just did not want to cooperate for this card.  I had the butterflies all stamped and then stamped my sentiment.  A bit of ink smeared from the edge of the stamp and the "you" didn't stamp all the way.  I contemplated stamping a new panel, but I really liked how this one had come out.  So I got the brilliant idea to stamp the sentiment on a banner and just layer it over the messed up sentiment.  Genius, except when I stamped the sentiment, I must have double tapped it a bit because the end of it came out all blurry.  Arrgghh.  But as my very first SU! demonstrator (and friend) says, "That's why you have two sides of a paper"!  So, I flipped the banner over and tried again.  And this time it worked.  Phew!  And you would never have know unless I told you.  : )  Then, because I can't go completely CAS I added a couple rhinestones to eat butterfly in coordinating colors and the added the button with a bit of twine.  Voila!  Would have been super easy if I didn't have all the sentiment trouble.  Head on over to The House blog to see the projects from the rest of the DT.  Then come play along.  I can't wait to see how you mix these colors.

Challenges:
Sweet Stamps #233--Summer (summer colors and butterflies are only around in the summer here)
Scrapper's Delight #47--anything goes
Cards Galore--anything goes
Suzy Bee's #91--wings or feathers
Jo's Scrap Shack #99--anything goes
Cute Card Thursday #384--citrus (lemon and lime are citrus colors)
Wags 'n Whiskers #159--recycle (the button was recycled from an item of clothing my girls have outgrown)
Fussy & Fancy #144--things with wings
{Pin}spirational Challenge #146--inspiration photo (I was inspired by the yellow, green and aqua signs)
https://www.pinterest.com/pin/141581982005984747/
Clear It Out--theme: anything goes; stash; anything goes (I've had the little rhinestones and green ink for a loooooong time)

Supplies:
Stamps: Repeat Impressions "9001W. Butterfly (lg)" and "1807W. I'm so glad . . ."
Dies: MFT "Blueprints 13" stitched rectangle and banner strip
Card Stock: PTI "Lemon Zest"
Inks: PTI "Lemon Zest" and "Aqua Mist"; SU! "Green Galore"

Monday, August 3, 2015

Ice Queen

The weeks are flying by and here it is time for another challenge from the Love To Scrap Challenge Blog.  For the next two weeks, the theme is WOW!  White on White.  Your image can be colored but other than that everything has to be white; cardstock, ribbon, pearls, etc.  And remember that you must have some stamping (rubber/clear or digi) somewhere on your project.  We have three sponsors for this challenge:


I got to work with an image from Lacy Sunshine Stamps and I chose this sweet image that I have had for a while and had yet to color up.  For me, white on white is a perfect theme for a Christmas card, so that's the direction I went.
Isn't she beautiful?!  White on white can be difficult, but I think the key is using lots of texture so think dry embossing, lots of layers, ribbon, etc.  I can't wait to see what you come up with.  So, head on over to the LTSCB blog and check out what the rest of the DT did with this challenge.

Challenges:
Jo's Scrap Shack #99--anything goes
Winter Wonderland--Christmas Carols/songs (mine is "I'm Dreaming of a White Christmas")
Christmas Stampin' All Year Long #52--anything goes
Creative Knockouts #100--dry embossing
Penny's Paper Challenge #238--use ribbon or twine
Sweet Sketch Wednesday 2--sketch

Sparkles Christmas Challenge #55--No patterned paper
Christmas Cards All Year 'Round--snowflakes

Supplies:
Stamps: Lacy Sunshine Stamps "Snowflake" digi; Verve "Ornamental Christmas" sentiment
Dies/embossing folders: Spellbinders "Standard Circles, large"; Sweet n' Sassy Stamps snowflake dies; MFT "Label Stax" die; the snowflake border die cut was a gift from someone; Darice snowflake embossing folder

Friday, July 31, 2015

Joy

Happy August!  I can't believe it's here already (but I think I say that every month)!  It's time for another challenge from Crafty Hazelnut's Christmas Challenge Extra.  As always, it is Anything Goes (as long as it is Christmas related) for the entire month.  Our sponsor is the fabulous Bugaboo Stamps and the prize is 7 images of the winners choice.  Here is my card:
See those corner brackets in the bottom two corners.  They are actually die cuts, but since I cut them out of the same color card stock as the main panel, they turned out looking like they were embossed instead.  It is a great way to add interest to plain corners without taking away from the focal point
If you have been playing along with us, then you already have a good head start on those Christmas cards.  If not, well, it's time to start.  It's so nice not to be scrambling to get cards finished in time to get them sent out.  I know, because it's happened to me several times.

Challenges:
Inspiration Destination #44--anything goes
Mod Squad--use a die (must be a die that One Happy Cut sells--mine is the Spellbinders "A2-Filigree")
Shopping Our Stash #212--diamonds are a girls best friend (black rhinestones)
Tuesday Morning Sketches #311--sketch

Christmas Card Challenge #39--anything goes
{Pin}spirational Challenge #145--inspiration photo (I was inspired by the Christmas Theme)
https://www.pinterest.com/pin/141581982012353809/
Craftin' Desert Divas--Christmas in July
Jo's Scrap Shack #99--anything goes
Winter Wonderland--Christmas Carols/Songs (I'm using Frosty the Snowman)
Christmas Stampin' All Year Long #52--anything goes


Supplies:
Stamps: Bugaboo Stamps "Chubby Snowman Scarf" digi; Clear Dollar Stamps "Flourishes" sentiment
Dies: Spellbinders "A2 Filigree"oval; MFT "Ornate Corners"

Thursday, July 30, 2015

With Sympathy

I seem to have had a lot of sympathy cards to make lately.  And though it is not a fun occasion to craft for, I do enjoy the challenge of making something beautiful yet sedate.

Challenges:
CraftDee Bow-Z--anything goes with a handmade bow
Cute Card Challenge #384--citrus (I went with the orange, lemon, grapefruit and a bit of lime colors)
Southern Girls--anything goes
Penny's Paper Challenge #238--use ribbon or twine
Addicted To Stamps #155--inspiration photo (I went with the colors and the flower theme)
Word Art Wednesday #194--anything goes
Top Tip Tuesday--I used the middle row: pearls/gems, sentiment and flowers
Fan-tastic Tuesday #96--make it feminine

Supplies:
Stamps: PTI "Mum's The Word" and "Boutique Borders: Sympathy"; JustRite Stampers "Crackle" background
Dies: Spellbinders "A2 Matting Basics A"; MFT "Blueprints 13" stitched rectangle