Saturday, December 30, 2017

Celebrate

It's Saturday!!  That means it's time for another challenge from Di's Digi Designs.
The challenge this time is:  Celebrate
And here is my card for your inspiration:
I guess with this beautiful daffodil, this sweet little bear could be celebrating spring (it's been FREEZING here, so spring will definitely be celebrated--even though we have a ways to go!), but I am in need of some birthday cards in my stash, so he is also celebrating a birthday.  Staying true to my goal to use up more of my bits and pieces stash I went looking to see what I could find and pulled out the tag, the bit of grass die cut, and the little piece of ribbon tied at the top of the tag--all good finds!  After I colored and fussy cut out my image, all I need to do was find a bit of coordinating paper and a bit of pink card stock to create the border.  Simple, but really pretty, I think.
  I hope you will get to play along with us for this challenge--there are so many things we need to celebrate!

Supplies:
Stamps: Di's Digi Stamps "Daffodil Bear"; Raisin Boat "Flourish Sayings"
Dies: MFT "Blueprints 13" tag shape; Sweet n' Sassy Stamps grass die; Fiskars "apron border" punch

Challenges:

Friday, December 29, 2017

Christmas Wreath

Esther from the Crop Stop Challenge Blog asked me to be a guest designer on the blog today.  Thank you Esther--what a great honor!  Here is the card I created for your inspiration:
I usually begin my cards with a sketch, but every once in a while, an idea pops into my head and I have to go with it.  This card was one of those times.  I knew I wanted to use my Darice Woodgrain embossing folder, so that was my starting point.  I'm trying to work on using up my "bits and pieces" stash, so I looked to see if there was anything that could be used for this card.  I discovered a die cut green "sprig" and realized that several of them would create a really fun wreath.  I used a green Spectrum Noir marker to color a bunch of white card stock scraps and die cut a bunch more sprigs (I think I used 7 total).  The numbers were also in the bits and pieces stash (in the perfect color) and I thought they were a fun addition.   After using my Fiskars paper trimmer to cut a card base out of white 110lb Core'dinations card stock, I used my Scor-pal board to create a top-fold, A2 sized card.
I used a stitched rectangle from My Favorite Things to die cut a panel out of the other half of the Core'dinations card stock sheet, embossed it with the embossing folder and then swiped some Grout Gray ink from My Favorite Things along the raised part to create even more dimension.
I used a Spellbinders die cut circle that was in my stash to trace a circle to build my wreath on. I adhered each of the sprigs around the circle with some liquid adhesive.  I used another die to cut out all of the little, pink circles, adhered them around the circle to look like berries, and added a bit of Cinnamon Stickles for some sparkle.  I added a sentiment on a hand cut banner and added it to the wreath with Scotch foam tape.  I finished the wreath off with a bow tied using my Bow-Easy and some pink ribbon.  Whenever I am adhering an embossed panel I like to use my 1/4" Scor tape to get a really secure hold.  I hope this inspires you to dig into those "bits and pieces" stashes and see what you can create.  Thanks so much to Esther for allowing me to guest design here on the Cropstop blog!

Supplies:
Stamps: Verve "Peace On Earth" sentiment
Dies:  MFT "Blueprints 13" stitched rectangle; Verve "Sprightly Sprigs"; PTI "By the Numbers"; Neat & Tangled "Falling Circles Cover plate" little circles

Challenges:
Craft-Dee Bow Z--anything goes with handmade bow
Christmas at Sweet Stampin--anything goes
Crafter's Cafe--Christmas or red, white, and green
Shopping Our Stash #334--GAH!! Pink!
Crafty Gals #155--anything goes
Simon Says Stamp Wednesday--anything goes
The Merry Christmas #49--anything goes with the optional twist of using a manger
Creative Knockouts #226--anything goes


Wednesday, December 27, 2017

Jesus is the reason

This is one of the last tags I made for Christmas gifts this year:
The red strip was in my bits and pieces stash and fit perfectly in the curve of the "J".  I love the sparkle; it really grabs your attention.

Supplies:
Stamps: PTI "Inspired: Jesus"; Your Next Stamp "Holiday Snow Globe"
Dies: MFT "Labels STAX"; PTI "Fancy Flakes" and "Inspired: Jesus"

Challenges:
Simon Says Stamp Wednesday--anything goes
Aurora Wings--anything but a card
Creative Knockouts #225--'tis the season
Word Art Wednesday #314--anything goes with uplifting sentiment
Stamplorations Tagplorations--all about Christmas with the optional twist of glitter

Power Poppy 12 days of Christmas--day #1 layered tags
Brown Sugar #273--anything but a card
{Pin}spirational Challenge #206--inspiration photo (Inspired by the colors, the Christmas theme and the presents)

Anniversary

Happy Wednesday!  The last one of 2017; can you believe it!?  Today begins another challenge from The House That Stamps Built.  It's a busy time of the year , so you'll enjoy this one: Anything Goes!  My parents' anniversary is the day after Christmas; here is the card I created for them:
I used some Christmas themed elements since it IS the day after Christmas, but I don't think it looks too Christmas-y with the pink and green color scheme (the papers are from a Christmas pack).  The gold, partial doily die cut and the kraft cirlce were in my bits and pieces stash and the circle would have been except I actually messed up the first stamping on it and had to cut a second one.  Argh!
I hope you will play along with us in our last challenge of the year.   I can't wait to see what you create!

Supplies:
Stamps: Repeat Impressions "Leaf Outline Wavy", "Happy Anniversary", and "Poinsettia"
Dies: Spellbinders "Classic Circles, large" and "Floral Doily Motifs"; PTI numbers border die

Challenges:
Stamplorations Theme and Sketch--stamps + gold

Crafts Galore--anything goes
Crafty Hazelnut's Patterned Paper--anything goes
Crop Stop--anything goes
Incy Wincy--red and green
Shopping Our Stash #334--Gah! Pink!
Crafty Creations #357--anything goes
Sweet Sketch Wednesday 2--fav sketch (I chose #111)

Cute Card Thursday #509--anything goes
Time Out Challenge #99--New Beginnings (anniversaries start a new year together) with the optional twist: use Christmas stamps for a non-Christmas card
Cardz TV #27--anything goes
Creative Craft #102--anything goes

Tuesday, December 26, 2017

Magic of Christmas

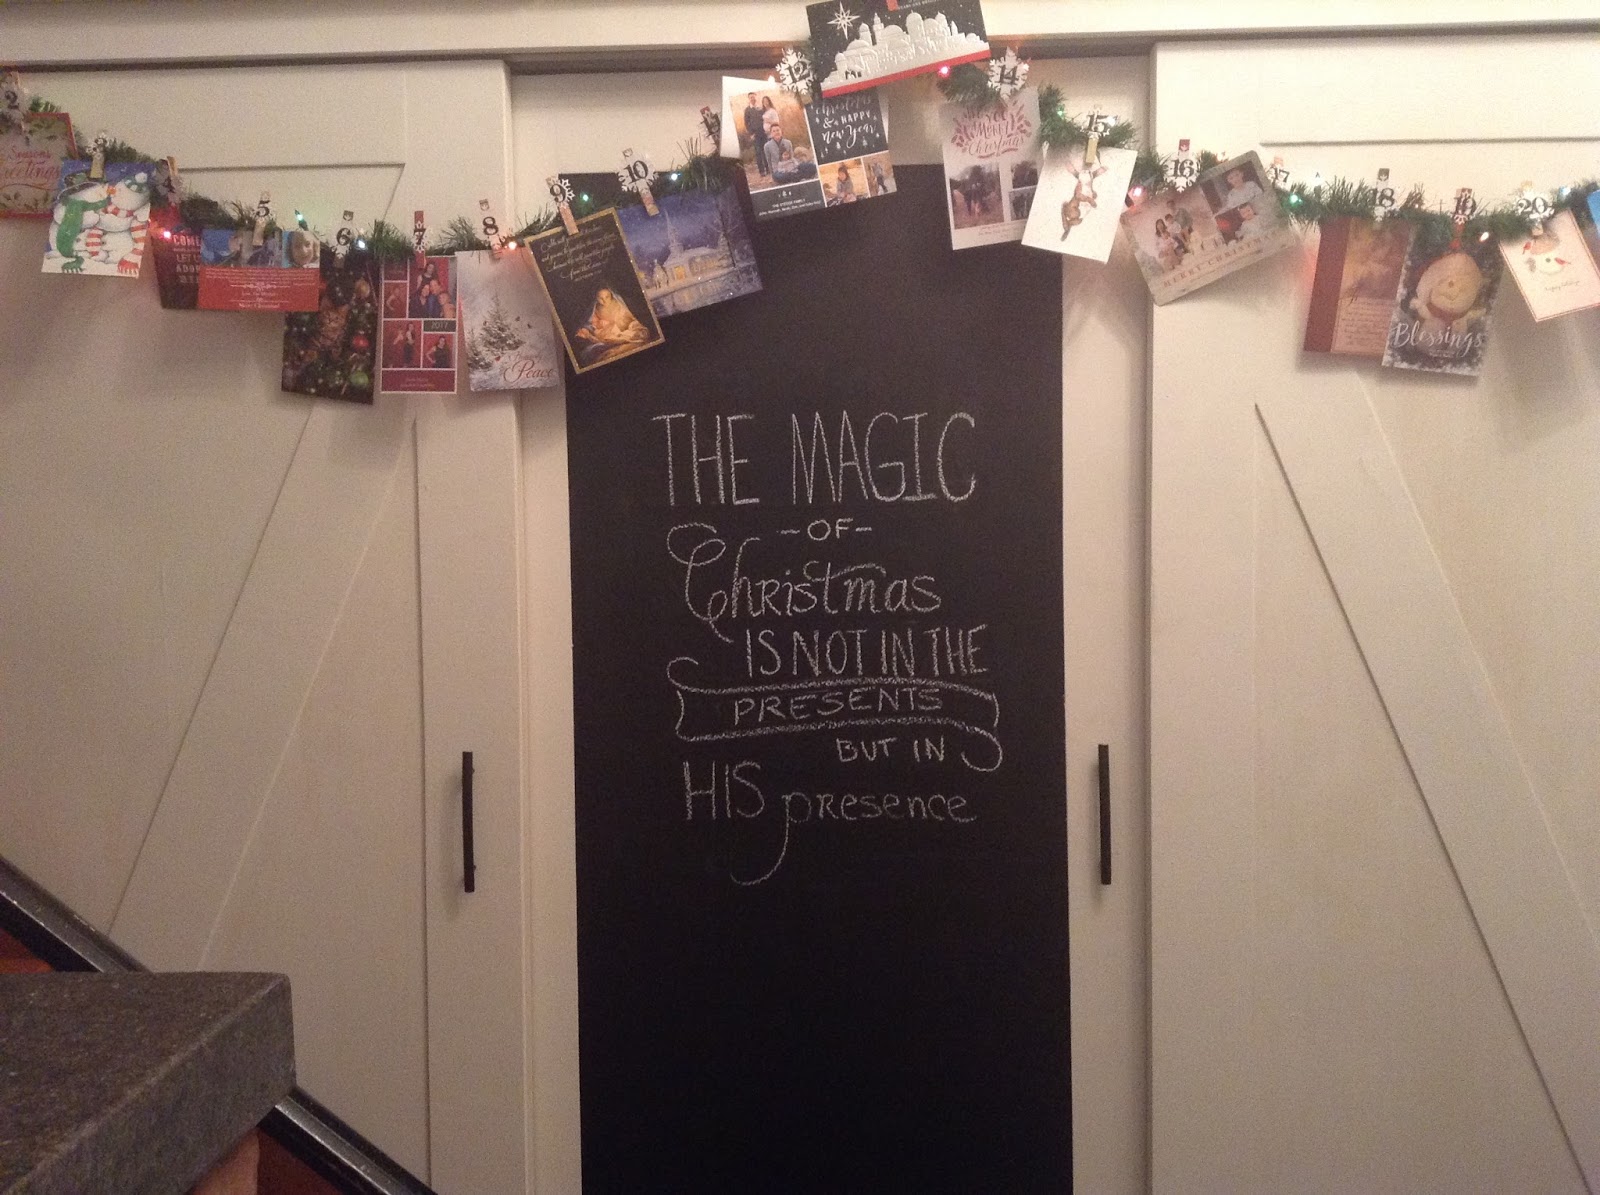
My husband and I (and various other family members) have been working on renovating our entryway.  Built in the 60's it was covered in that fabulous wood paneling and since we replaced the windows in our house about 12 years ago, we haven't even had any trim around them.  So, it was way past time!  One of the things we did was replace our sliding closet doors with sliding barn doors and we added a chalkboard panel to the center door.  While I was finishing up my Christmas cards last week, I noticed that several of the stamps would make fabulous chalkboard art.  So, I stamped one of the sentiments on a piece of paper . . .
 And then proceeded to turn it into this:
I think next year, another of these stamps will grace my chalkboard.

Through The Purple Haze #140--anything goes
Word Art Wednesday #314--anything goes with uplifting sentiment
Tuesday Morning Sketches #424--anything goes

CAS Christmas

While in the midst of addressing my Christmas cards last week, I discovered that I was 5 short (which actually turned out to be 3 when I found two cards hiding in a stack of papers).  So I had a quick mass-production party and created 6 cards (now I have a head start on next year!).  The bases are a nice, deep purple.  The white panels were dry embossed and then cut with the stitched rectangle.  Then I heat embossed the sentiment in the center and added 3 silver rhinestones.  Quick and easy, but really quite beautiful.
 And here is a closer look:

Supplies:
Stamps: Verve "Peace on Earth"
Dies: MFT "Blueprints 13" stitched rectangle
Darice ornament embossing folder

Challenges:
The Holly and Ivy Christmas Challenge--anything goes
Creative Craft Cottage #102--anything goes
Sweet Stampin'--last minute Christmas/CAS
Hiding In My Craft Room #332--any holiday
Cardz TV #27--anything goes
Crimbo Crackers #148--anything goes
Cute Card Thursday #509--anything goes
Creative Knockouts #225--'tis the season
Word Art Wednesday #314--anything goes with uplifting sentiment
Christmas at Sweet Stampin'--anything goes


Monday, December 25, 2017

Peace

Merry Christmas!!!  Today is Project of the Week day over on the House That Stamps Built  blog, and it's my week to share a project with you.  Raise your hand if you have one of those Giant packs of Mulberry paper that were so popular in the mid-2000s.  Raise it really high if you still have TONS of it left!  My hand is raised as high as I can get it, so I'm going to show you how you can use some of it up.
 I learned this technique from Bonnie Garby and now I use it all the time.  It really adds great texture and softness and uses some of that mulberry paper.  Here's what you need:
--mulberry paper
--dies and/or straight edge
--fine paint brush and water or I used my SU! blender pens (an aqua brush would also work)
Lay your die on the mulberry paper, making sure you leave some room around the edges as it is hard to tear if you don't have much paper to grab onto.
 Use your wet paintbrush (or blender pen/aqua brush) to trace around the edge of the die.  Go over it several times to make sure it is damp.
Then gently tear around the water line.  It tears quite easily and the tear stays along the wet line for the most part.  But, the softness of the torn edges hides any place where it might tear off the line a little bit.  In the photo below, you can see my torn circle and the tracing around my label die.  This was the first time I had tried this with such a sharp point on the die, but you will see later it still worked perfectly.
 As you can see below, this left a narrow border around the label.  I ended up cutting those wild fibers a little bit before I adhered everything.
 To do a straight edge for a panel mat, use your ruler, or I use my perfect layer tool to draw a straight line with your wet paintbrush/blender pen.  This part is even easier as the straight lines tear really nicely!
 And while I was creating this project, I discovered a great way to use those little torn strips left over from tearing a mat--you can adhere them to the back of another panel and no one will ever know they were scraps!
And here is the finished card:
I love the softness of the mulberry layers; it adds so much interest.  The white label die cut was in my bits and pieces stash and the multi-colored dotted paper and the silver snowflake were cut from scraps as were all the mulberry layers.  I heat embossed the ornament image, poinsettia, and the peace sentiment with silver embossing powder and colored in the ornament topper with a silver sharpie.  Love how it turned out!

Supplies:
Stamps: Repeat Impressions "Ornament Frame", "Peace" and "Poinsettia"
Dies: Spellbinders "Classic Circles, large"; Verve "Vintage Oval Frame"; Memory Box "Lindeman Snowflake"; MFT "Scalloped trio"

Challenges:
The Holly and Ivy Christmas Challenge--anything Christmas goes
Creative Craft Cottage #102--anything goes
Pixie's Crafty Workshop #313--anything goes with snippets (snippets of mulberry paper and the items from my bits and pieces stash)
Hiding In My Craft Room #332--any holiday
Cardz TV #27--anything goes
Crimbo Crackers #148--anything goes
Cute Card Thursday #509--anything goes
C.R.A.F.T. #447--anything goes
The Merry Christmas Challenge #48--anything goes
Mod Squad--winter holiday
Crafty Creations #357--anything goes
Crafty Gals' Corner Challenge #154--anything goes
The Paper Shelter--anything goes
Shopping Our Stash #334--Gah!! Pink!
Fussy and Fancy #202--Christmas
Crafter's Cafe--Christmas OR red, white, and green
In The Pink #127--pink Christmas
Creative Inspirations #284--Christmas/winter
Stinkin' Inkers--celebrating the holidays
Viva La Verve--sketch

Crafting with an Attitude--anything goes
Dare 2B Artzy--spirit of the season